Gym equipment upholstery faces sweat, skin oils, friction, and repeated cleaning every day. Vinyl seats may look durable, yet harsh products can leave them cracked, sticky, or discolored. A careful routine protects both hygiene and the equipment’s usable life.
The practical question is: How to clean gym equipment upholstery without damaging it? Start by checking the manufacturer’s care instructions. Their guidance should take priority over general cleaning advice. In my experience, a soft microfiber cloth, lukewarm water, and a mild cleaner are safer than aggressive chemicals. Always test the product on a hidden area first. Wait until the surface dries completely.
Small details matter. Wipe sweat from seams and edges, where moisture often stays unnoticed. Do not flood the padding. Water can move through stitching and create lingering odors beneath the cover. Spray the cloth, not the upholstery, when possible. This gives better control around adjustment levers and exposed metal.
Disinfect carefully.
Not every disinfectant suits synthetic leather. Alcohol-heavy formulas, bleach, and abrasive powders may weaken the finish. Follow the product label and observe the required contact time. Then remove residue when the instructions allow it. Dry the surface with a clean towel and leave the equipment uncovered.
These seven tips focus on safe habits, but no method is perfect. Staff may clean too quickly during busy hours. Users may also overlook damp corners. A simple inspection can catch those mistakes before they become expensive repairs. Clean equipment should feel fresh, dry, and intact—not merely smell strongly of chemicals.
Identify Upholstery Materials and Check Manufacturer Guidelines
Before cleaning gym equipment, identify the upholstery material. Benches may use vinyl, polyurethane leather, genuine leather, mesh, or coated fabric. These materials can look similar, but they react differently to moisture and chemicals. Check the sewn-in label, service manual, or facility maintenance sheet. Manufacturer guidance matters. It may specify a safe pH range, dilution ratio, contact time, or drying method. Never assume a household disinfectant suits every surface. Strong alcohol, bleach, or abrasive powders can cause fading, cracking, or sticky residue. I once treated a small vinyl mark too aggressively, and the finish became dull. That mistake was avoidable. Test the cleaner on a hidden area first, then wait until the surface fully dries.
Use a lightly damp microfiber cloth for vinyl and polyurethane upholstery. Apply the solution to the cloth, not directly onto seams, buttons, or foam openings. Genuine leather usually needs a cleaner and conditioner approved for leather surfaces. Mesh upholstery benefits from gentle brushing because sweat and dust collect between the fibers. Avoid soaking it. Follow the stated dwell time, then remove residue with a clean, damp cloth. Dry each surface with ventilation, not intense heat. Recheck the manufacturer’s instructions when materials are uncertain. If no guidance exists, choose the mildest compatible method and ask a qualified equipment technician. Records help. Note the material, cleaner, dilution, and any surface change after testing. My own cleaning notes are not perfect, but they prevent repeating careless guesses.
7 Tips to Clean Gym Equipment Upholstery Safely
Different upholstery materials react differently to water, friction, and cleaning chemicals. Identify the surface first, follow the manufacturer’s care instructions, remove loose debris, use a mild cleaner, avoid saturation, rinse residue when appropriate, and allow the upholstery to dry completely.
Gather Safe Cleaning Supplies and Prepare the Equipment
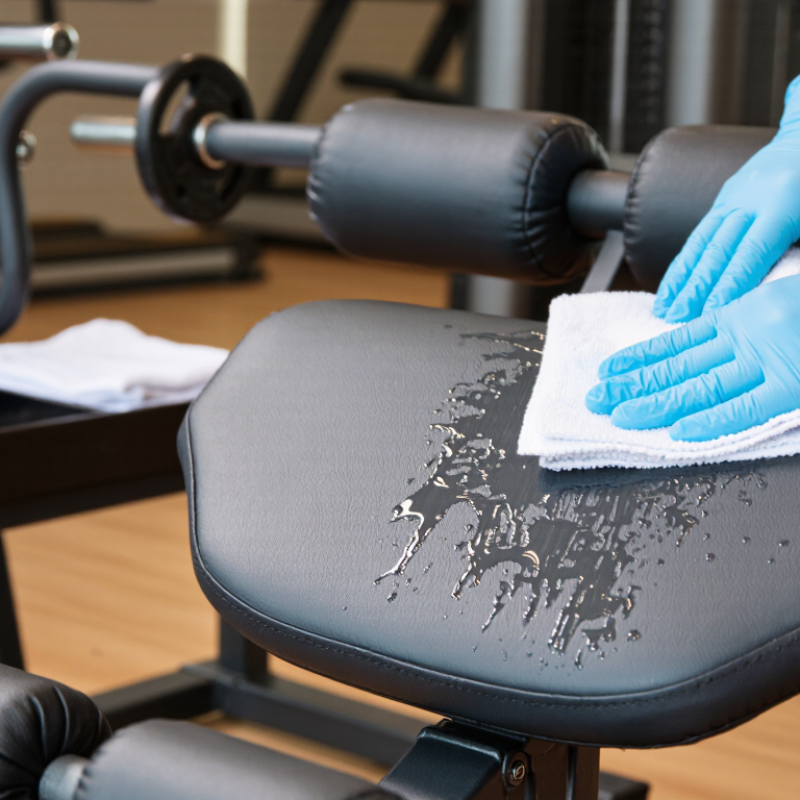
Before cleaning gym equipment upholstery, gather supplies that will not attack the covering or leave a slippery film. Use clean microfiber cloths, a soft-bristled brush, lukewarm water, and a mild, pH-neutral cleaner. Keep a separate dry towel nearby. It helps remove moisture before it reaches the foam beneath the upholstery. Wear gloves, improve ventilation, and keep the work area free from loose weights or cables. Avoid bleach, ammonia, strong solvents, abrasive pads, and high-pressure steam. These materials can discolor vinyl, weaken stitching, or force moisture deep inside.
Prepare the equipment before applying any solution. Turn off and unplug powered machines when the care instructions allow it. Do not spray near screens, switches, seams, or electrical openings. Remove surface dust with a dry cloth, then check the care label or maintenance manual for restrictions. Test the cleaner on a hidden section and wait until it dries. Watch for color transfer or a sticky finish.
I once used too much liquid on a padded bench, assuming more cleaner meant better hygiene. The surface looked clean, but the foam stayed damp for hours. That mistake changed my routine.
Spray the cloth, not the upholstery, and work in small sections. Use gentle strokes around stitched edges. Leave the surface slightly damp, never soaked. Dry it with a fresh towel, then allow complete air drying before use. Not always convenient. Still, rushing this step can trap odor and encourage microbial growth.
Apply Cleaner Correctly Without Saturating the Upholstery
7 Tips to Clean Gym Equipment Upholstery Safely
Gym upholstery needs controlled moisture, not a soaking treatment. Start by vacuuming dust from seams and wiping loose debris with a dry microfiber cloth. Check the manufacturer’s care label, then test diluted cleaner on a hidden section. Wait until it dries. Color transfer or stiffening means stop.
Never spray directly onto vinyl, coated fabric, or stitched panels. Spray a small amount onto the cloth instead. The cloth should feel damp, not wet. Apply cleaner in short passes, keeping liquid away from seams, zippers, and exposed foam. Use a second cloth to remove residue. Less is safer. Excess moisture can migrate below the cover, slow drying, and encourage unpleasant odors.
Follow the product’s stated contact time, but do not extend it by adding more liquid. The U.S. Environmental Protection Agency explains that disinfectants must remain visibly wet for their labeled contact time. More product does not equal better control. The Centers for Disease Control and Prevention reports that improved hand hygiene can reduce respiratory illnesses by approximately 16–21%, reinforcing the value of consistent cleaning routines. Still, upholstery is not a handwashing station. It requires separate care. Allow airflow before equipment returns to service, and inspect dark seams the next day. No method is perfect. A rushed wipe can leave residue, while over-cleaning can damage the surface. Technician judgment matters.
7 Tips to Clean Gym Equipment Upholstery Safely? - Apply Cleaner Correctly Without Saturating the Upholstery
| Tip |
Cleaning Action |
How to Apply the Cleaner |
Moisture Control |
Safety Check |
| 1. Read the upholstery-care instructions |
Check the equipment manual or the upholstery care label before cleaning. |
Use only a cleaner that is suitable for the upholstery material and its care code. |
Avoid cleaning methods that are not approved for the material. |
Stop if the label warns against water-based products, solvents, or disinfectants. |
| 2. Remove loose dirt first |
Wipe away dust, hair, and grit before applying liquid cleaner. |
Use a clean, soft-bristled brush or a vacuum with an upholstery attachment. |
Start with a dry-cleaning step to reduce the amount of liquid needed. |
Do not use a stiff brush that could scratch or roughen coated surfaces. |
| 3. Test a hidden area |
Check for color transfer, fading, swelling, or surface damage. |
Apply a small amount of diluted cleaner to an inconspicuous area using a white cloth. |
Use only enough product to lightly dampen the test area. |
Allow the area to dry and inspect it before cleaning the visible upholstery. |
| 4. Apply cleaner to the cloth |
Clean small sections instead of covering the entire cushion at once. |
Spray or pour the approved cleaner onto a microfiber cloth rather than directly onto the upholstery. |
The cloth should be damp, not dripping wet. |
Keep liquid away from seams, zippers, adjustment controls, and electrical parts. |
| 5. Wipe gently and evenly |
Lift body oils and surface soil with controlled strokes. |
Work in overlapping passes without aggressive scrubbing. |
Use light pressure so cleaner does not penetrate deeply into foam or padding. |
Refold or replace the cloth when it becomes visibly dirty to prevent re-depositing soil. |
| 6. Remove residue |
Remove remaining cleaner according to the product directions. |
Use a separate cloth lightly dampened with clean water when the cleaner instructions require rinsing. |
Never flood the surface or repeatedly soak the same area. |
Check for sticky residue, streaks, or excess moisture before drying. |
| 7. Dry completely before use |
Leave the equipment unused until the upholstery is fully dry. |
Blot excess moisture with a dry towel and follow the cleaner’s drying instructions. |
Improve airflow with ventilation; avoid sealing damp upholstery under covers. |
Do not return equipment to service if it feels damp, smells strongly of cleaner, or shows seepage at seams. |
Important: Always follow the upholstery manufacturer’s instructions and the cleaner’s label. Do not mix cleaning chemicals, and use appropriate ventilation and protective equipment when required.
Dry, Inspect, and Maintain Gym Equipment Upholstery Regularly
7 Tips to Clean Gym Equipment Upholstery Safely
Gym equipment upholstery needs more than a quick wipe after busy training sessions. Sweat, body oils, and fine dust collect around seams and adjustment points. Tip 1: Read the equipment care instructions before using any cleaner. Tip 2: Remove loose dust with a soft, dry cloth. Do not begin with a wet surface. Tip 3: Inspect the upholstery for cracks, lifted stitching, or exposed padding. Small damage can worsen under pressure. I once missed a tiny split near a seat edge, and repeated cleaning made it larger.
Tip 4: Test a mild cleaning solution on a hidden area first. Use a lightly damp cloth, not a soaked one. Excess moisture can enter foam and create lingering odors. Tip 5: Wipe gently in one direction, especially across textured vinyl. Avoid abrasive pads, harsh solvents, and excessive scrubbing. Clean the seams carefully, but do not flood them. Let the surface air-dry completely before use.
Tip 6: Dry the upholstery after every cleaning session. A clean towel speeds drying around stitching and corners. Good ventilation helps. Tip 7: Inspect the equipment weekly, even when it appears clean. Check loose covers, flattened padding, and moisture beneath removable cushions. Record repeated problems, because memory is unreliable. Maintenance is sometimes less perfect than planned, but regular attention prevents minor wear from becoming a safety concern.
Conclusion
Cleaning gym equipment upholstery safely starts with identifying the material, such as vinyl, leather, mesh, or coated fabric, and checking the manufacturer’s care instructions. The key question is: “How to clean gym equipment upholstery without damaging it?” Use gentle, non-abrasive supplies, clean cloths, and suitable disinfecting products. Before cleaning, unplug or secure the equipment when necessary, remove loose dust and sweat residue, and test the solution on a small, hidden area. Treat visible stains carefully before disinfecting, avoiding harsh scrubbing that may weaken the surface.
Apply the cleaner to a cloth rather than soaking the upholstery, and wipe with controlled, even strokes. Excess moisture can seep into seams, padding, or internal components, so never saturate the material. Afterward, use a dry cloth to remove remaining moisture and allow the equipment to air-dry completely in a well-ventilated area. Inspect the upholstery for missed stains, cracking, or discoloration, and establish a regular cleaning routine to prevent buildup and extend the equipment’s usable life.

 Naturist Fitness