Choosing a Smith machine for solo lifting in 2026 requires more than comparing prices and glossy product photos. You need a stable training platform, predictable movement, and safety features that work under pressure. The American College of Sports Medicine’s 2025 Worldwide Survey of Fitness Trends placed traditional strength training among the leading global fitness trends. That demand reflects a practical reality: more people are building strength at home, often without a training partner nearby.
Why you should invest in a Smith machine for solo lifting? A guided bar can reduce balance demands and provide adjustable safety catches during squats, presses, and lunges. It does not remove every risk. The bar path may feel restrictive, especially for lifters with unusual proportions or limited shoulder mobility. A machine should support good technique, not replace it. WHO guidance still emphasizes progressive, well-managed strength activity rather than careless loading.
Look closely at the details. Check the machine’s rated capacity, rail smoothness, hook spacing, frame stability, and emergency stop position. Measure ceiling height before delivery. A low-quality carriage can rattle like loose hardware during a heavy repetition. Research from organizations such as NSCA and ACSM consistently supports controlled progression, competent instruction, and appropriate equipment selection. Yet manufacturer claims deserve verification through warranty terms, service availability, and independent reviews. This is where buyers often rush. I would not. A wider platform may feel safer, but it can consume valuable floor space. The best choice balances solo confidence, biomechanics, maintenance, and the workouts you will realistically perform every week.
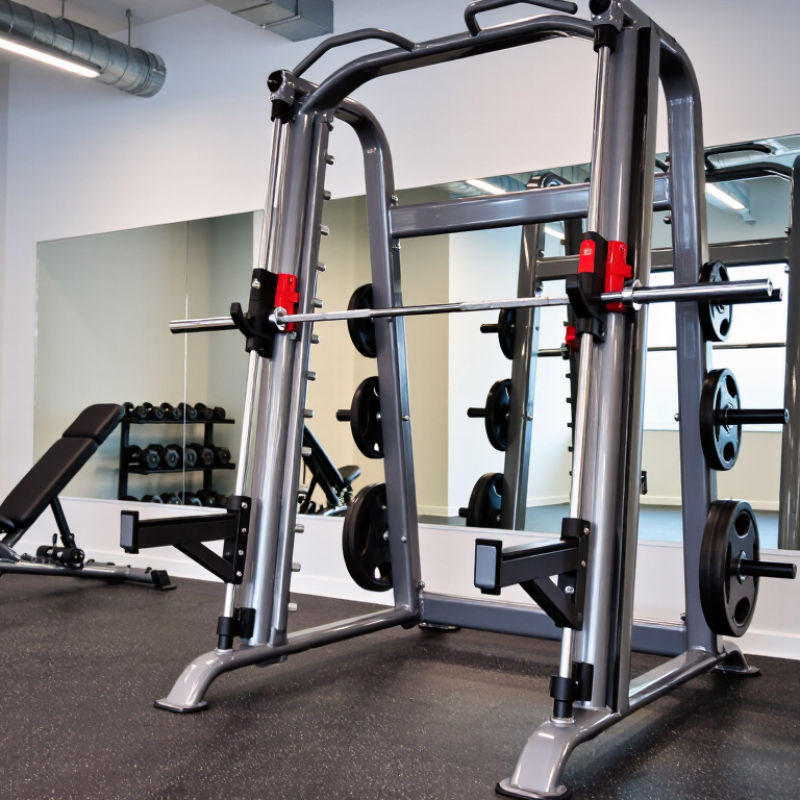
Choosing a Smith machine for solo lifting starts with an honest training goal. Decide whether you want strength, muscle growth, rehabilitation, or general fitness. Your answer affects the bar path, safety system, and available attachments. A fixed bar path can support controlled squats and presses when no training partner is present. However, it may not match your natural movement perfectly. I learned this after feeling my knees shift during deeper squats.
Measure your training environment before comparing features. Record the ceiling height, floor area, doorway width, and distance from nearby walls. Leave enough space to unrack weights without twisting. A rubber platform can reduce noise and protect the floor, but it needs a stable, level base. Check the machine’s weight capacity and safety-stop positions. The stops should catch the bar below your lowest safe point, not several inches above it. Test this with an empty bar.
Solo lifting also requires practical judgment. Choose adjustable safety settings that you can reach quickly between sets. Look for smooth travel, secure locking points, and clear assembly instructions. Inspect bolts and moving parts regularly, especially after the first few workouts. I once focused too much on attachments and overlooked poor cable alignment. That mistake made the machine less useful. Your ideal setup may also include adjustable dumbbells, a bench, and enough ventilation for long sessions. Keep a phone nearby, but do not treat it as a substitute for careful load selection.
| Evaluation Dimension | Solo Lifting Question | Practical Target | Why It Matters | Priority |
|---|---|---|---|---|
| Primary Training Goal | What type of training will be performed most often? | Select a rack for the main focus: strength, hypertrophy, general fitness, or rehabilitation. | Different goals require different weight capacities, adjustment ranges, and accessories. | Essential |
| Exercise Selection | Will the machine support squats, presses, rows, lunges, and hip-hinge movements? | Choose adjustable safeties and hooks with enough vertical travel for the planned exercises. | A machine that only suits one movement can limit long-term training value. | Essential |
| User Height and Bar Travel | Does the bar path provide a comfortable range of motion for the primary lifter? | Prefer approximately 180–220 cm of usable vertical travel for a broad range of standing exercises. | Insufficient travel may restrict squat depth, overhead pressing, or deadlift setup. | High |
| Weight Capacity | What is the expected working load and future progression? | For general home use, target a tested capacity of at least 180–225 kg; serious strength users should seek a higher rating. | A capacity margin supports progressive overload and reduces equipment stress. | Essential |
| Safety System | Can the bar be stopped quickly if a repetition fails? | Use a system with multiple locking positions, adjustable safety arms, and a clearly defined fail-safe mechanism. | Reliable safeties are the main advantage of solo Smith-machine training. | Essential |
| Bar Movement | Is the guided bar path suitable for the lifter’s technique? | Compare vertical and slightly angled designs; test the path with an empty bar when possible. | A guided path improves consistency but may not feel natural for every exercise or body type. | High |
| Home-Gym Floor Area | How much permanent floor space is available? | Allow roughly 2.0–2.5 m in width, 1.5–2.0 m in depth, and at least 2.3–2.5 m of ceiling height. | The listed footprint may not include plate storage, bench clearance, or walking space. | Essential |
| Floor and Surface | Can the floor support the machine and repeated loading? | Use a level, solid surface with dense rubber flooring; confirm the floor’s load rating in apartments or upper floors. | Uneven or weak flooring can reduce stability and increase noise or vibration. | High |
| Frame Stability | Will the frame remain stable during heavy or uneven movements? | Look for a wide base, substantial steel uprights, secure fasteners, and floor-bolt provisions where appropriate. | Stability improves confidence and helps keep the bar path smooth. | Essential |
| Bar Starting Weight | Can beginners and lighter users move the bar comfortably? | Check the actual counterbalanced or unloaded bar weight; common guided bars may range from about 7–25 kg. | A lighter starting load can be useful for rehabilitation, technique work, and smaller lifters. | Medium |
| Adjustment Speed | Can the bar height and safety settings be changed quickly between sets? | Choose clearly marked adjustment points with secure, easy-to-grip locking components. | Fast adjustments make supersets and different exercises more practical in a home gym. | High |
| Bench Compatibility | Will the bench fit safely inside the uprights? | Check internal width, bench height, pad length, and clearance from the moving bar. | Poor alignment can create an awkward press position and reduce safety. | High |
| Noise and Neighbors | Will training disturb other people in the building? | Prioritize smooth linear bearings or bushings, controlled plate handling, and thick rubber flooring. | Noise is usually caused by impact, vibration, loose hardware, or poor surface protection. | Medium |
| Storage Requirements | Can plates, collars, and accessories be stored safely? | Allow additional space for weight horns or select a design with integrated storage. | Organized storage keeps walkways clear and reduces trip hazards during solo sessions. | Medium |
| Maintenance Access | Can moving parts be inspected and maintained easily? | Choose accessible guide rods, replaceable wear components, and clear lubrication instructions. | Regular inspection helps maintain smooth movement and reliable safety performance. | High |
| Best Match for a Strength-Focused User | Is maximum loading and stability more important than compactness? | Select a heavy, anchorable frame with high-capacity safeties and ample plate storage. | A larger structure generally provides more stability and room for progression. | Essential |
| Best Match for a Small-Space User | Can the machine fit without blocking doors, windows, or walkways? | Prioritize a compact footprint, adequate ceiling clearance, and enough room to enter and exit safely. | A machine that cannot be used comfortably will reduce training consistency. | Essential |
Selection rule: For solo lifting, prioritize safety mechanisms, frame stability, correct dimensions, and a suitable bar path before considering extra accessories or appearance.
Decide whether you want strength, muscle growth, rehabilitation, or general fitness. Your goal affects bar movement, safety settings, and attachments. A fixed path can help solo squats and presses. It may not match your natural movement perfectly.
Measure ceiling height, floor area, doorway width, and nearby wall distance. Leave room to unrack weights without twisting. A rubber platform can reduce noise and protect the floor. It needs a stable, level base. Measure twice.
Check the frame, bar, and safety-catch ratings separately. Do not assume one rating covers everything. Leave at least 20% capacity for wear and future progress. Uneven loading can also reduce practical capacity. Labels can mislead.
Move the empty bar slowly and at moderate speed. Listen for scraping or sudden resistance. The bar should not twist sharply between the rails. Smooth travel helps control, but stability matters more under heavy loads. I sometimes overvalue silky movement.
Set the stops just below your lowest safe lifting position. They should catch the bar during a failed repetition. Test them with an empty bar before adding weights. Adjustable settings should be reachable quickly between sets. Do not guess.
Stand inside the frame and compare the bar path with your squat. Check your hip, knee, and shoulder positions. Test the hooks with an empty bar. They should rotate without forcing your wrists. Small differences matter.
Confirm support for squats, presses, rows, split squats, and calf raises. Check bench clearance before attempting incline pressing. A tall bench may create a cramped setup. Measure your preferred lifting angles at home. I underestimated this once.
No. Choose attachments that support your actual training routine. Useful options may include cable handles, pull-up bars, dip handles, and storage pegs. Check every load rating and locking mechanism. Attachments should not block the bar or bench. More parts can create clutter.
Choosing the right Smith machine for solo lifting in 2026 starts with understanding your training goals, available space, and preferred exercises. Consider whether you need a compact setup for strength training at home or a more versatile station for full-body workouts. Compare frame stability, rail angle, bar path, and safety catches, since these features directly affect confidence and control when training without a spotter. Also review the machine’s weight capacity, starting resistance, adjustment points, and how smoothly the bar moves.
Why you should invest in a Smith machine for solo lifting? A well-designed model can provide guided movement, reliable safety support, and greater exercise variety while reducing the need for assistance. Check whether it supports squats, presses, rows, lunges, and other movements comfortably, and look for useful attachments that match your routine. Finally, measure your training area, set a realistic budget, and consider assembly, lubrication, durability, and future maintenance. The best choice balances safety, versatility, comfort, and long-term value rather than focusing only on price.

 Naturist Fitness